Work zones are high-risk environments where safety depends on clear communication, proper planning, and the right equipment. Whether it’s roadworks, construction sites, or maintenance areas, a well-organised setup helps protect workers, guide traffic, and reduce accidents.
This checklist covers the essential equipment needed to create a safe and compliant work zone across Australia.
Why Work Zone Safety Matters
Work zones involve constant movement of vehicles, machinery, and personnel. Without proper safety measures, risks can quickly escalate.
Common hazards include:
- Vehicle and worker interaction
- Poor visibility in changing conditions
- Confusing or unclear traffic guidance
- Unprotected work areas
Using the right equipment ensures that both workers and the public can move safely through or around the site.
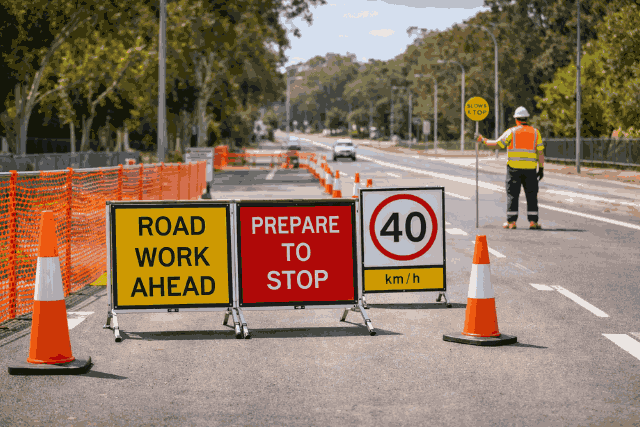
Clear signage is critical for informing drivers of upcoming changes and guiding them safely through the work zone.
Key signs to include:
- Roadwork ahead signs – provide early warning
- Speed reduction signs – control traffic speed
- Lane closure and detour signs – guide traffic flow
- Stop/Slow signs – manage manual traffic control
Proper placement and visibility are essential to ensure drivers have enough time to react.
2. Traffic Cones and Cone Bars
Traffic cones are used to create temporary lanes, mark hazards, and separate work areas from live traffic.
Benefits:
- Quick and flexible setup
- Highly visible in day and night conditions
- Easy to reposition as work progresses
Cone bars can be added between cones to create a more defined barrier and improve visual guidance.
3. Barriers and Safety Fencing
Physical barriers help create a clear boundary between the work zone and surrounding areas.
Common options:
- Barrier mesh – lightweight and effective for temporary fencing
- Plastic or metal barriers – for higher-impact protection
- Bunting flags and chains – for visual separation in low-risk areas
These are essential for keeping unauthorised personnel out of hazardous zones.
4. Bollards and Delineation Posts
Bollards and delineators help guide traffic and reinforce boundaries within the work zone.
Use cases:
- Directing vehicles through temporary lanes
- Marking restricted or hazardous areas
- Providing additional visual guidance in low-light conditions
They are especially useful for longer-term or semi-permanent setups.
5. Safety Lighting and Reflective Products
Visibility is critical, especially during night works or low-light conditions.
Key solutions:
- Solar lights and hazard lights – improve night visibility
- Reflective markers and materials – enhance sign and barrier visibility
- Illuminated signage – for high-risk or high-speed areas
Proper lighting ensures that drivers can clearly see the work zone ahead.
6. Wheel Stops and Ground Safety Controls
In certain work zones, especially temporary setups or site compounds, wheel stops help control vehicle positioning.
Benefits:
- Prevent vehicles from entering restricted zones
- Protect workers and equipment
- Maintain organised parking or loading areas
They are particularly useful in site access points and temporary parking zones.
7. Personal Safety and Site Awareness
While equipment plays a major role, overall safety also depends on site awareness and visibility.
This includes:
- Clear entry and exit points
- Defined pedestrian walkways
- Consistent layout and spacing of equipment
A well-structured site reduces confusion and improves compliance from both workers and drivers.
Bringing It All Together
A safe work zone is not built with a single product—it’s created through a combination of equipment working together:
- Signage communicates
- Cones and barriers guide and protect
- Lighting and reflective elements improve visibility
- Bollards and posts reinforce structure
When properly planned and implemented, these elements create a safer, more controlled environment for everyone involved.
Built for Australian Conditions
Work zone equipment must withstand:
- Harsh UV exposure
- Heavy-duty use
- Changing weather conditions
Choosing durable, compliant products ensures long-term reliability and consistent performance across Australian worksites.
FAQs
What is the most important element in a work zone setup?
Clear and visible signage is essential, as it communicates changes and guides traffic safely.
How far in advance should roadwork signs be placed?
This depends on road speed and conditions, but signs should always provide enough warning time for drivers to react safely.
Are traffic cones enough for a work zone?
Cones are important, but they should be combined with signage, barriers, and lighting for full safety coverage.
Do work zones require lighting at night?
Yes, proper lighting and reflective materials are essential for visibility and safety during low-light conditions.
Conclusion
Setting up a safe work zone starts with preparation and the right equipment.
By using a complete checklist—from signage and cones to barriers, lighting, and bollards—you can create a work zone that is safer, more organised, and compliant with Australian standards.
Explore Work Zone Safety Solutions with Civil Products WA
Planning your next project?
Browse a complete range of temporary signage, traffic control equipment, barriers, and safety solutions from Civil Products WA, designed to support safe and efficient work zones across Australia.
👉 Explore our full range!
Contact Us